|
First step is to get to know the application and the authentication credentials to better adjust the macro and avoid common collateral effects such as "spontaneous logoff" (when our spider engine logoff from the application by navigating through a specific transaction).
Follow the steps below and you have a high probability to succeed:
| 2. | You should see a blank screen. If a macro is already fulfilled, press "New"  button to reinitiate; button to reinitiate; |
| 3. | Under "Macro Details", choose a "Macro Name" and click on "This is an authentication macro"; |

| 4. | There are two options to add pages/transactions to this macro: automatic (via browser) and manual. If you wan to use the latter, just add/remove URLs using the "Plus/Minus" button in the right side of the "Web Macro Sequence" table. We will use first technique -- just click on "Start Proxy" button: |

| • | Tip: You are free to modify IP address (as long as you have that IP bound to your network interface) and TCP Port. Threads are the allowed number of simultaneous connections allowed to the Web Proxy. |
| 5. | Once started, click on "Start Browser" button. N-Stalker will attempt to automatically configure your browser to be used within the "Macro Recorder" tool. If you have problems doing so, you should manually configure it (using your browser's network connection). You will end up with a browser opened for navigation purposes. |
| 6. | Start navigating through your application. As we are creating a web macro, you must go to login page and initiate a valid authentication attempt. N-Stalker will record all information within the "Web Macro Sequence" table. |
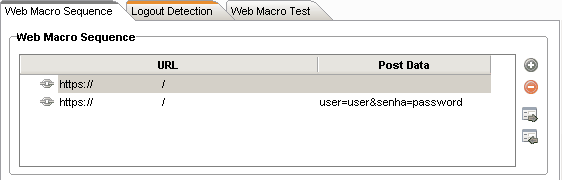
| • | Tip: you are free to remove or add entries at any time. Just select the resource and use "minus" button in the right side to delete it. To add, just use "Plus" button. |
| 7. | Continue to navigate until you are completely authenticated. |
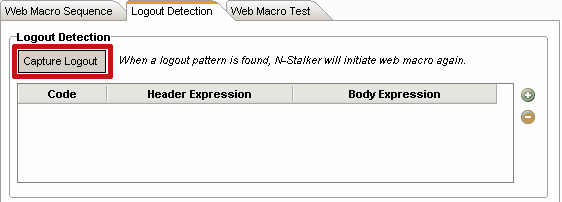
| 8. | To prevent your application from logging out accidentally, we may configure "logout detection". To do so, press "Capture Logout" button. |
| 9. | A message box will appear stating "Please navigate throughout the protected application area and click "OK" when finished". DO NOT CLOSE IT. |
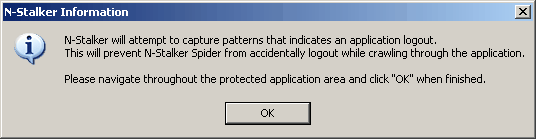
| 10. | Now back to your browser, you must navigate throughout the protected area (i.e: areas within the application that will require you to be authenticated). N-Stalker will remove all of your credentials to simulate a logout state; |
| 11. | Now back to "Macro Recorder", press "OK"; |
| 12. | There are two conditions you may face: either the application will take an action (redirection) if you are logged out or it will do nothing (but display a "not authenticated" or "your session is expired" message). If the first situation is the case, N-Stalker will create automatically a logout detection filter, otherwise, you will be required to manually enter a filter. |

| 13. | If you need to manually add a logout filter (e.g: your application is returning a valid response with a "not authenticated" message). Click on "Plus" button in the right side and add the following: |

| • | Header Expression: N/A (empty) |
| • | Body Expression: not authenticated |
| 14. | Now it is safe to save and close your macro. Click on "Save"  button to commit changes; button to commit changes; |
| 15. | Click on "Macro Recorder" button in the top menu to get back to N-Stalker's main screen. |
---
You may load a Web Macro to handle Web Form Authentication. To load the Web Macro execute next steps:
Under N-Stalker's main screen, click on "New Scan" button to initiate "Scan Wizard" and enter web application URL;
Under "Choose Scan Policy", you must pick the desired policy to be used;
Once done, you must click on "Next" button to continue.
Authentication settings allow you to configure a number of authentication options to interact along with Web Applications. You should use the following option:
In "Web Macro Authentication"
Sele
|