|
If you are not already inside the "Policy Editor" tool, see "Scan Policy Overview".
Follow the steps below to create your own security assessment policy:
Choose the desired Scan Policy Type from the upper combo box;
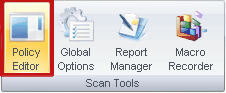
| 1. | To open the N-Stalker policy editor please click on the "Policy Editor" button on N-Stalker top menu: |
When ready, it will be necessary to choose a name for your policy (default name is "Unnamed Policy");

| 2. | In the left side, enable all security checks you want to be part of the new policy. If you need any assistance, click on the item and more information will be displayed in the right-side panel; |
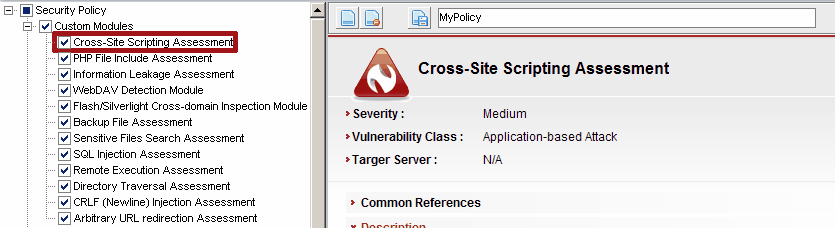
| 3. | Now you must press "Save" button  to commit changes to disk (you will be required to point a file location); to commit changes to disk (you will be required to point a file location); |
| 4. | To create a new policy click on "Create a new policy" button  to restart the N-Stalker policy editor. to restart the N-Stalker policy editor. |
| 5. | Once saved, click on "Close" button  to get back to N-Stalker's main screen. to get back to N-Stalker's main screen. |
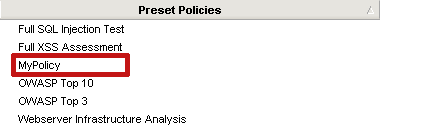
| 6. | The available policies are published on N-Stalker main screen’s lower right corner, under the "Preset Policies" section. It is possible to visualize the newly created policy on the list. |
|